Welcome to our little blog new friends! Here is the tutorial as promised from the mini class earlier this evening. It was so wonderful to see all of your smiling faces at tonight's Garden event!
One of the best things about this project was that it was all from reusing items we had around the garage. I have a thing for old drawers, I like to collect them and make fun things out of them! I had a few drawers to chose from as you can see- I decided to go with the long one in the front of this photo.
I already had some lumber from another project that had gone by the way side and decided it was the perfect fit for this project. We started pulling this little pallet table apart right away. I also put to work my super cute son K and had him sanding the top of the drawer smooth. I LOVE having cute helpers!
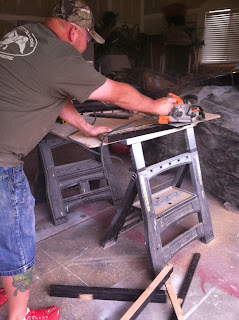
Oh LOOK...another really cute helper, this one is my hubby and partner Kyle. After we took apart the pallet thingy he striped down the wood to smaller sections for the legs. He makes this looks so easy!
See that pile of wood up there, that is going to be the bones of this project.
Next my two cute helpers started to work on the base of the planter. The bottom side of this drawer is quite thin and needed extra "umph" to it so we added some wood pieces to help the legs that were being drilled in. We also added leg spacers to the middle of the two legs on each side to help sturdy this up.
Once both sides had the legs and middle pieces for sturdiness we started adding the bottom shelf to the planter. Skinny pieces of the wood were stapled onto the width of the bottom like so.
This created a nice place for the pallet pieces we cut earlier to be stapled on and create the bottom shelf.
And TA DA-the planter is fully assembled. Now,you may be asking yourself "What does this gal do in this project of building the fall planter?" I will tell you! I am the beautifier (if that is even a word) but that is what I do best! I painted the planter a nice creamy color with green accents. After I let it dry I took a palm sander to it and roughed up the edges and front to make it look rustic. I then added a light once over coat of wood stain. I really like the way wood stain can make things look old instantly. Next I found some cute knobs I thought went well with the outdoorsy theme of this planter. The last thing I did was decorate! A few fall pumpkins from the garden and corn stalk accent and this baby is ready for the porch!
I would really like to thank my husband for putting up with me and all of my "Pinterest projects" he is truly talented and always feels my vision for things I want to create. I love him with all my heart!


0 comments:
Post a Comment